How to install wordpress using workpress toolkit
In the first part the WordPress installation with one-click is demonstrated and in the second the custom installation so that your website can be reached directly under the root directory.
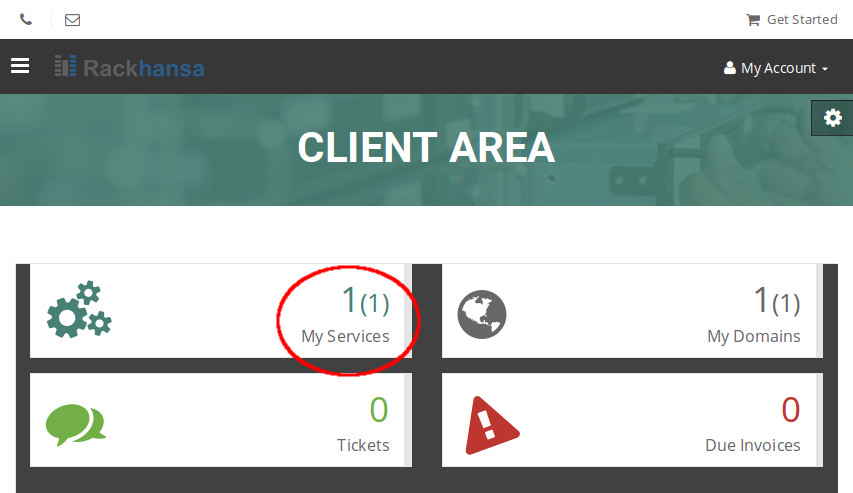
1. After logging in, click on “My Services”, so You will see a list of all services in your account.
2. Now select the domain You’d like to manage.
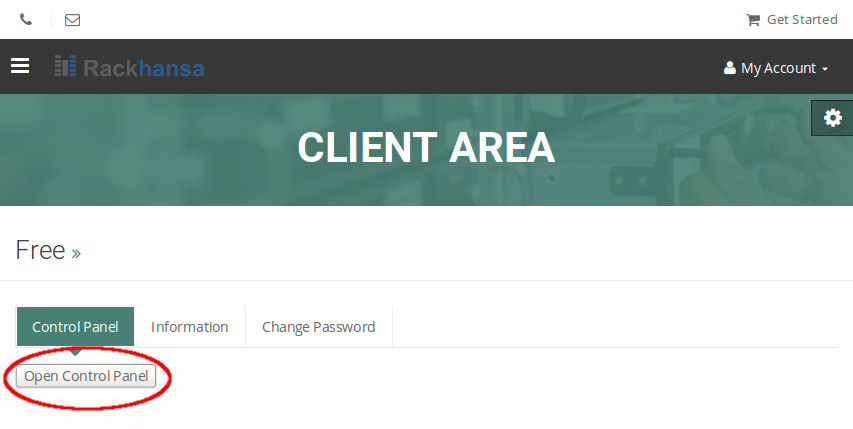
3. Open the Webhosting Control Panel.
After a click on the “Open Control Panel” the single-sign-on-process is carried out and a new tab or window is opened. You are automatically logged in in the server of your ordered webhosting package. Your webhosting control panel session is https secured with our “Wildcard Certificate”.
With this single signed on features You only need to remember the only one very strong password for your client area account.
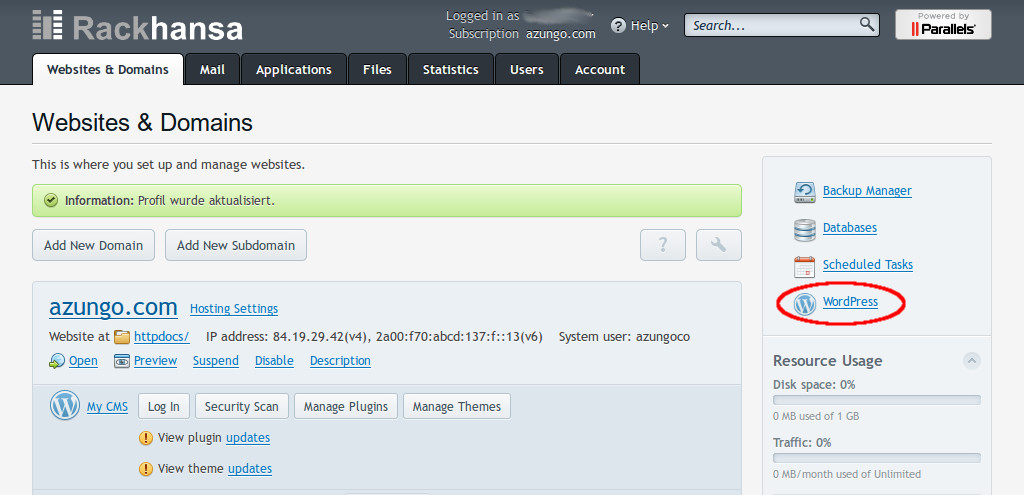
4. Now click right on “WordPress”.
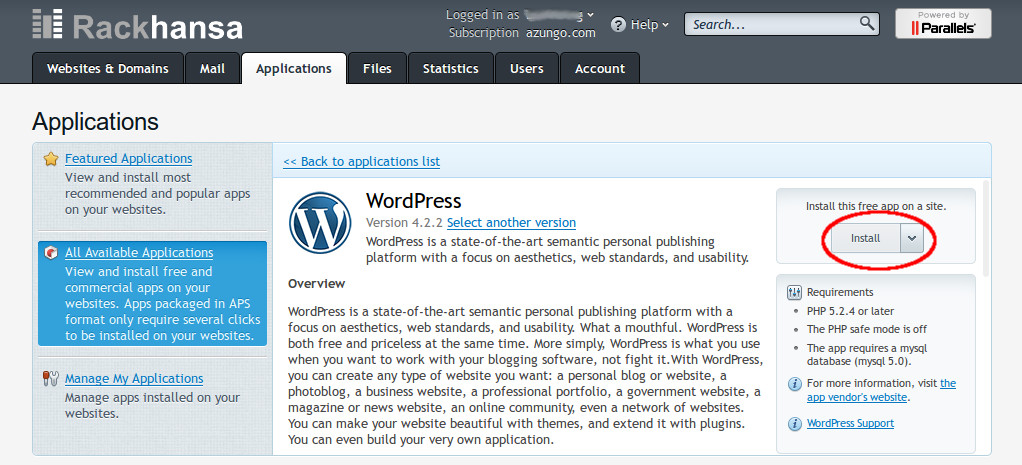
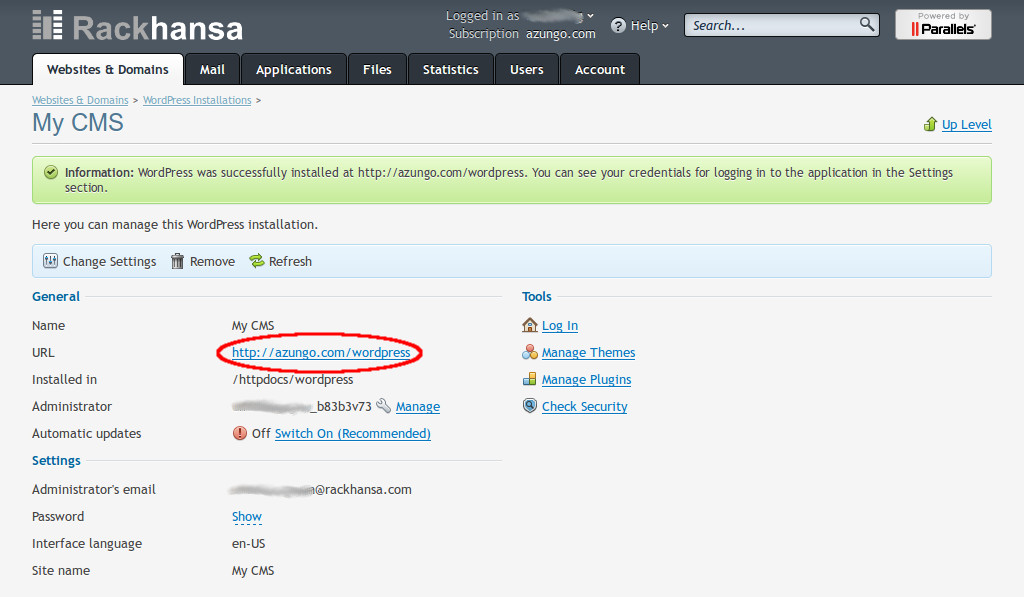
5. Here an overview of all of your WordPress installations is displayed. Click “Install” to continue.
6. Completed as quickly is the simple WordPress installation!
Custom Installation of WordPress
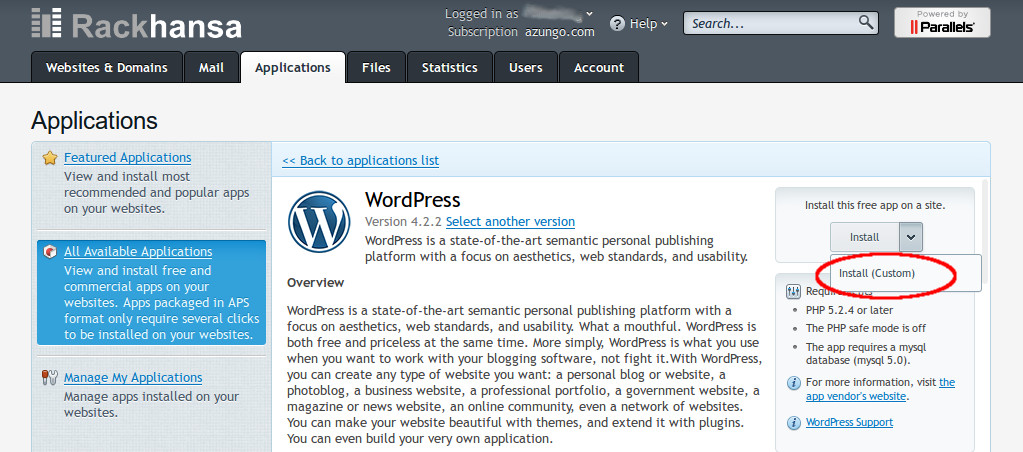
1. Alternatively, You can also set up a custom installation of WordPress by selecting the option “Install (Custom)”.
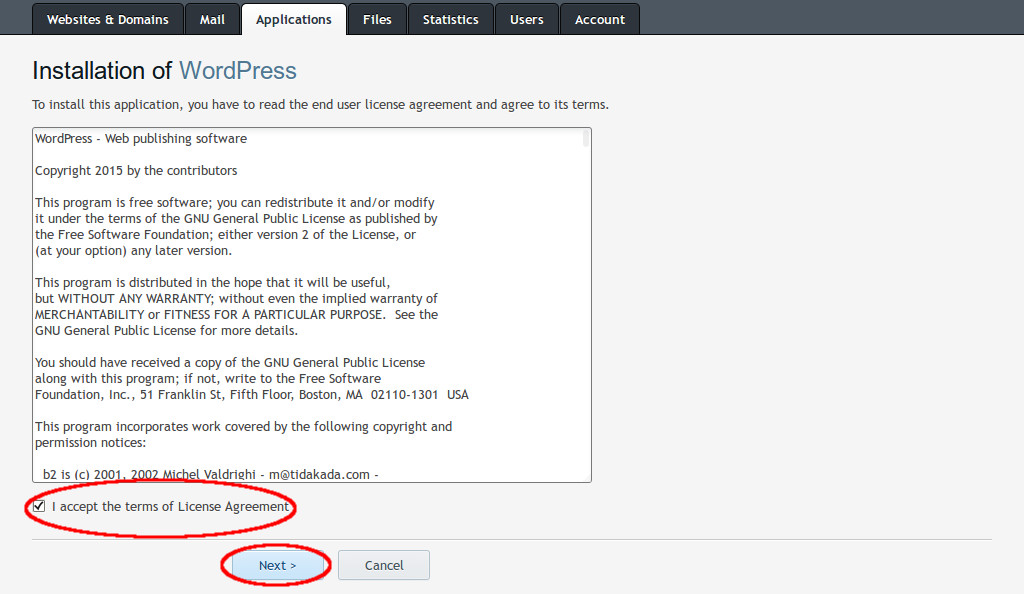
2. This takes You to the license agreements. To continue installation, please agree to the license terms by placing a check mark and click “Next”.
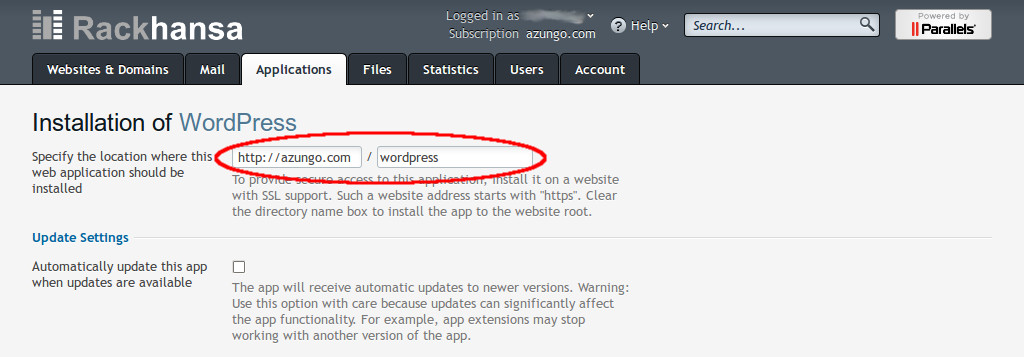
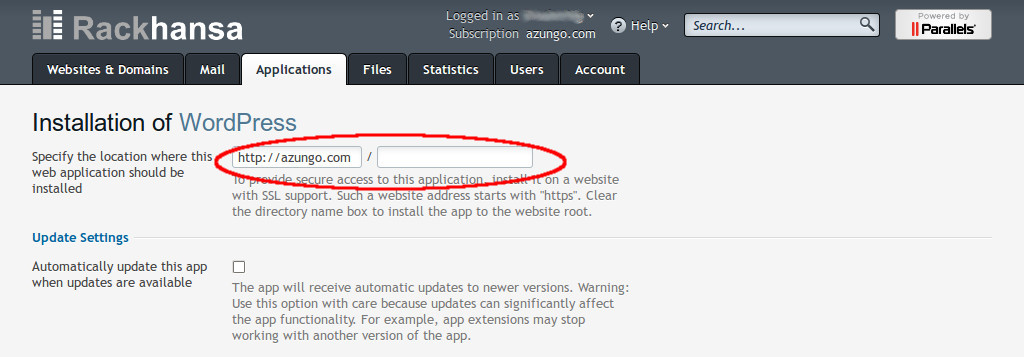
3. You can hide the location of installation by simply removing “/ wordpress” while setting up WordPress so according to your desire You can choose a new name or new URL for your domain.
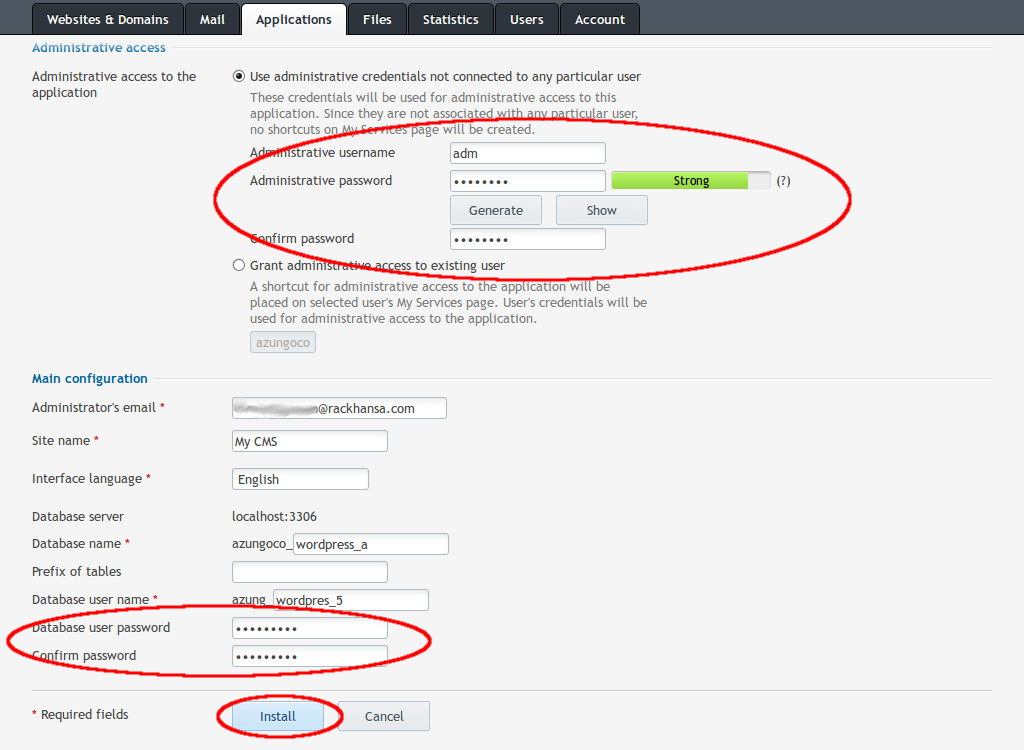
4. Create a username and set a secure password. Alternatively, You can generate a password which can be made visible with WordPress Toolkit.
In the section “Email Configuration” also set a strong password and click on “Install”.
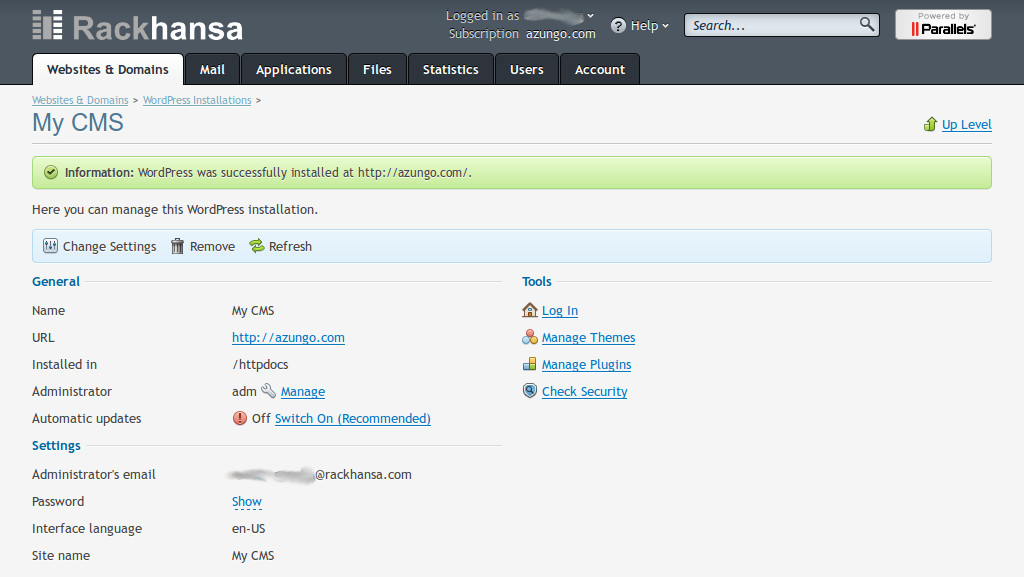
5. Now You’re finished with the custom installation.


