How to install Proftpd with TLS on Ubuntu 14 LTS, Trusty Tahr
ProFTPd (Professional File Transfer Protocol daemon) is widely used for the purpose of file transfer between server / client or two peer servers, therefor we’ve decided to cover this topic in which we will learn how to install ProFTPD with support of SSL/TLS encryption. To accomplish this goal we will follow the steps given below:
- Prerequisites
- Installing Proftpd and OpenSSL
- Configuration of Proftpd
- Adding a FTP User
- Configuration of TLS in Proftpd
- Testing installation
Prerequisites
- Ubuntu 14.04.2 LTS, Trusty Tahr
- sudo or root privileges
What we accomplish in this tutorial:
- Installation of Proftpd and OpenSSL
- Configuration of Proftpd
- Configuration of User
- Configuration of TLS with proftpd
- Testing
Installing Proftpd and OpenSSL
ProFTPD and OpenSSL can be easily installed using apt-get command because they’re available repository of Ubuntu 14.x
sudo apt-get install -y proftpd openssl
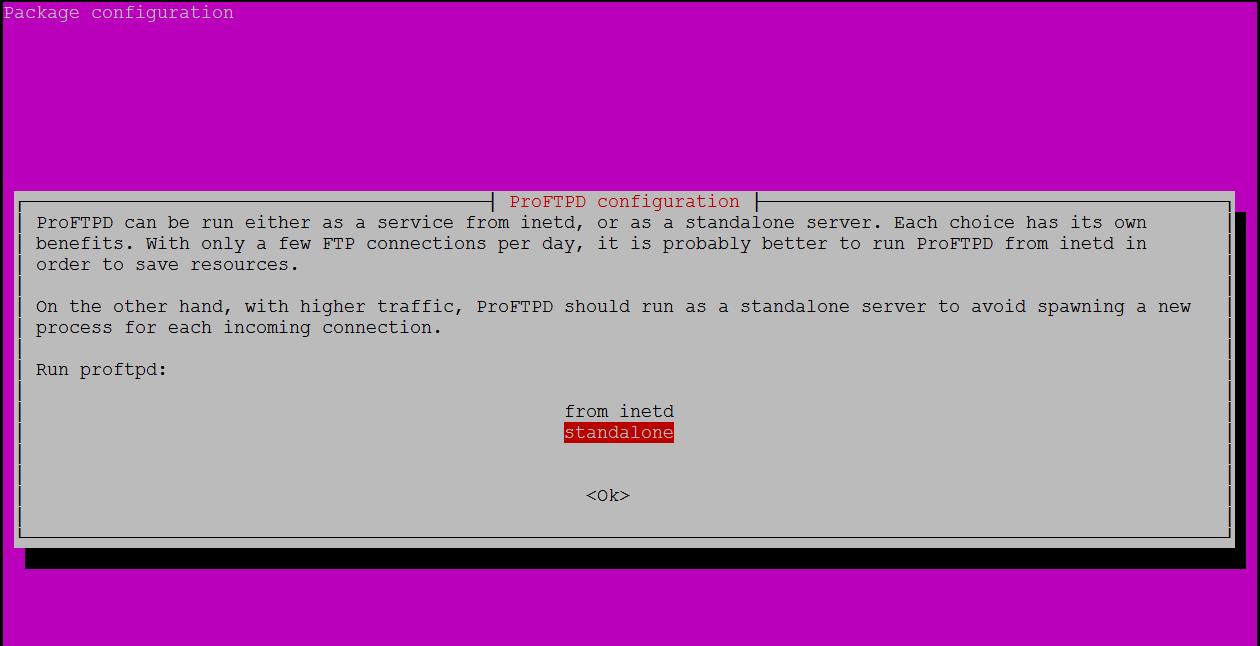
During installation you will be asked whether to run ProFTPD as an Inetd or as Standalone Service. Choose the standalone option and proceed.
Configuration of Proftpd
After successful installation of ProFTPD, we will make some changes in the configuration files. Config file for ProFTPD is located in /etc/proftpd/ directory. Let’s edit proftpd.conf file with nano editor.
nano /etc/proftpd/proftpd.conf
Search for the line containing ‘Servername’, then change it to the name of your hostname or domain:
Look for and uncomment DefaultRoot:
 # Use this to jail all users in their homes
DefaultRoot   		~
Now let’s restart Proftpd service:
service proftpd restart
Adding a FTP User
FTP Server is usually access through two common ways:
1. Anonymous FTP Access, this provides access to anyone without the need to have a user account and password entered.
2. Access with username and password, this way only authentic users can access the ftp server.
We will configure option 2 here because it’s more secure and recommended.
Before we could create a user for Proftpd, we will add /bin/false to /etc/shells file.
echo "/bin/false" >> /etc/shells
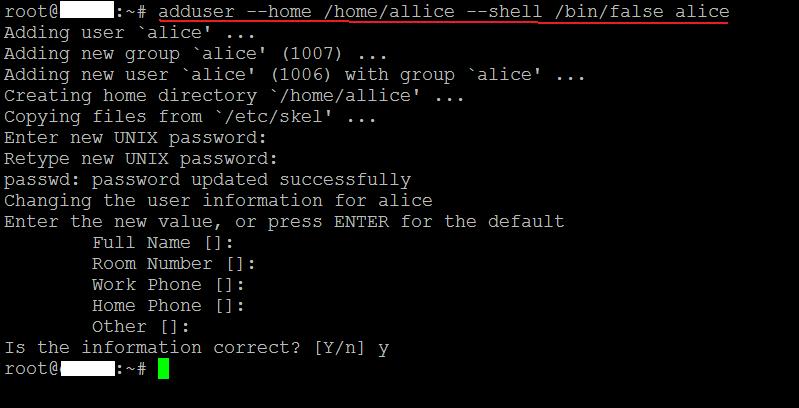
And now we will create a user with a home directory where he will get access to FTP Server. We will disable shell access for this user by assigning the “/bin/false” shell to him to make sure that he can not login by SSH. For this instance we will use the username “alice”, please feel free to replace Alice with the username of your choice.
adduser --home /home/alice --shell /bin/false alice
adduser --home /home/alice --shell /bin/false alice
This above command will create a new user called ‘Alice’ with home directory /home/alice/ and without shell access /bin/false.
And now we will configure Proftpd to allow the user ‘Alice’ to access the FTP server.
nano /etc/proftpd/proftpd.conf
 <Directory /home/alice>
Umask 022 022
AllowOverwrite off
     <Limit LOGIN>
        AllowUser alice
        DenyALL
     </Limit>
     <Limit ALL>
        Order Allow,Deny
        AllowUser alice
        Deny ALL
    </Limit>
    <Limit MKD STOR DELE XMKD RNRF RNTO RMD XRMD>
    AllowUser alice
    Deny ALL
    </Limit>
</Directory>
service proftpd stop service proftpd start
Configuration of TLS in Proftpd
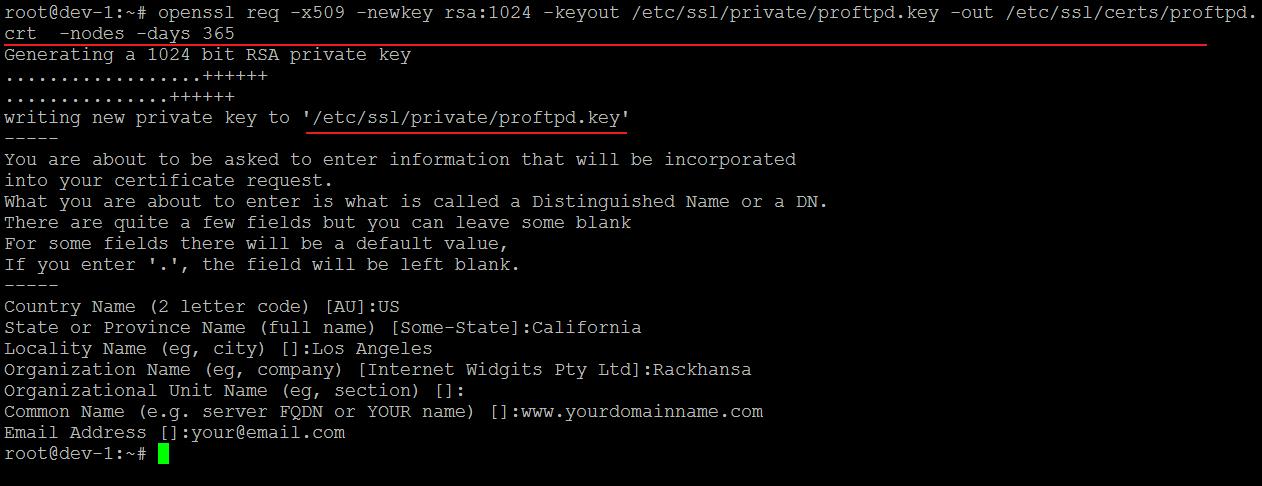
In order to use TLS we will have to create an SSL certificate. Here we will generate the SSL certificate using the openssl command:
openssl req -x509 -newkey rsa:1024 -keyout /etc/ssl/private/proftpd.key -out /etc/ssl/certs/proftpd.crt -nodes -days 365
This command will generate a certificate file by the name proftpd.crt in directory /etc/ssl/certs/ , and a certificate key fileproftpd.key in the /etc/ssl/private/ directory.
Now, let’s change the file permissions of the certificate files to 600 so that we can disallow access by other users
chmod 600 /etc/ssl/private/proftpd.key
Now we’ll go back to the ProFTPD configuration file to use SSL the certificate that we generated
nano /etc/proftpd/proftpd.conf
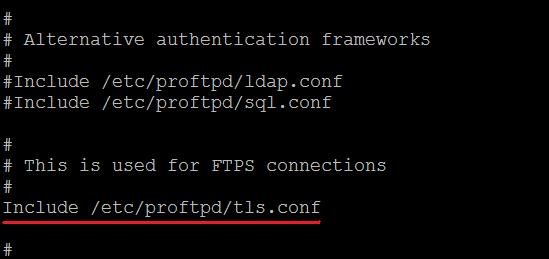
Then we will uncomment the TLS line:
Include /etc/proftpd/tls.conf
After saving the file we will open the TLS config file:
nano /etc/proftpd/tls.conf
Now, we will uncomment all the lines shown below:
 TLSEngine                               on
TLSLog                                  /var/log/proftpd/tls.log
TLSProtocol                             SSLv23
TLSRSACertificateFile                   /etc/ssl/certs/proftpd.crt
TLSRSACertificateKeyFile                /etc/ssl/private/proftpd.key
TLSOptions                              NoCertRequest
TLSVerifyClient                         off
TLSRequired                             on
After saving the file, the last step would be restarting the ProFTPD service:
service proftpd restart
Note: If your ProFTPD service is some how not restarted, then we will follow this manual method.
Testing installation
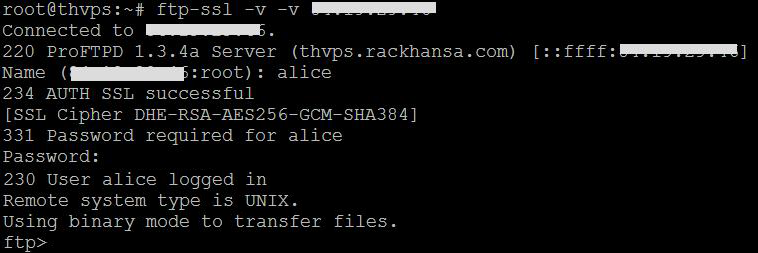
To test the configuration, try connect to your ftp server with an FTP client. We’ll use simple ftp-ssl command to verify that encryption is enabled. When asked for username type ‘Alice’ (or the username you created) and its corresponding password.
ftp-ssl -v -v domainnameofyourftp.com
A successful connection should look similar to this:
Feel free to contact us if you believe you’re still facing issues following these steps. Rackhansa Professionals are always ready to help their customers in making their online presence smooth and uninterrupted. Our free webhosting services have also been devised mainly for those entrepreneurs who have just jumped into online business. To know more about our services, please visit our products page to enjoy the cheap hosting plans.


